- Cut Supports
Cut the four supports equally to fit into the interior corners of the cabinet. The supports may beed to be on bottom using the sawtooth cut as a starting point. Then cut the top of the support to match the length of your cabinet interior. - Glue Supports
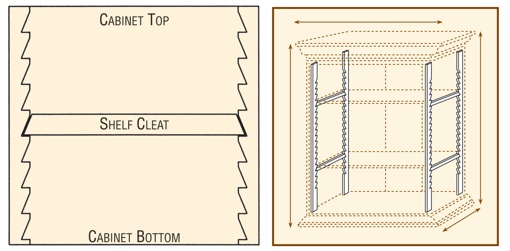
Secure supports into the corner with sawtooth cuts facing each other and with the flat of the cuts facing towards the top of the cabinet. Glue with wood glue and/or nail with finish nails or pins. - Cut Cleats
Cut the cleat based on the depth of the cabinet so that it will fit between a pair of sawtooth supports. Cut each end of the cleat at a 22.5° angle to fit into the cut and rest on the flat part of the sawtooth cut.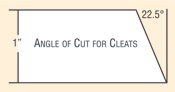
- Notch Shelves
Cut a notch in each corner of a shelf to fit around the sawtooth support. Each side of the shelf will rest on top of one of the installed adjustable cleats. - Install Shelves and Enjoy!